Retirement
RISPIRA empowers you to plan confidently for retirement by organizing your clients' goals and aligning them with actionable strategies. It ensures every step taken today leads to a secure and prosperous tomorrow.
RISPIRA is revolutionizing the way financial professionals communicate and interact with their clients.


R
I
S
P
I
R
A
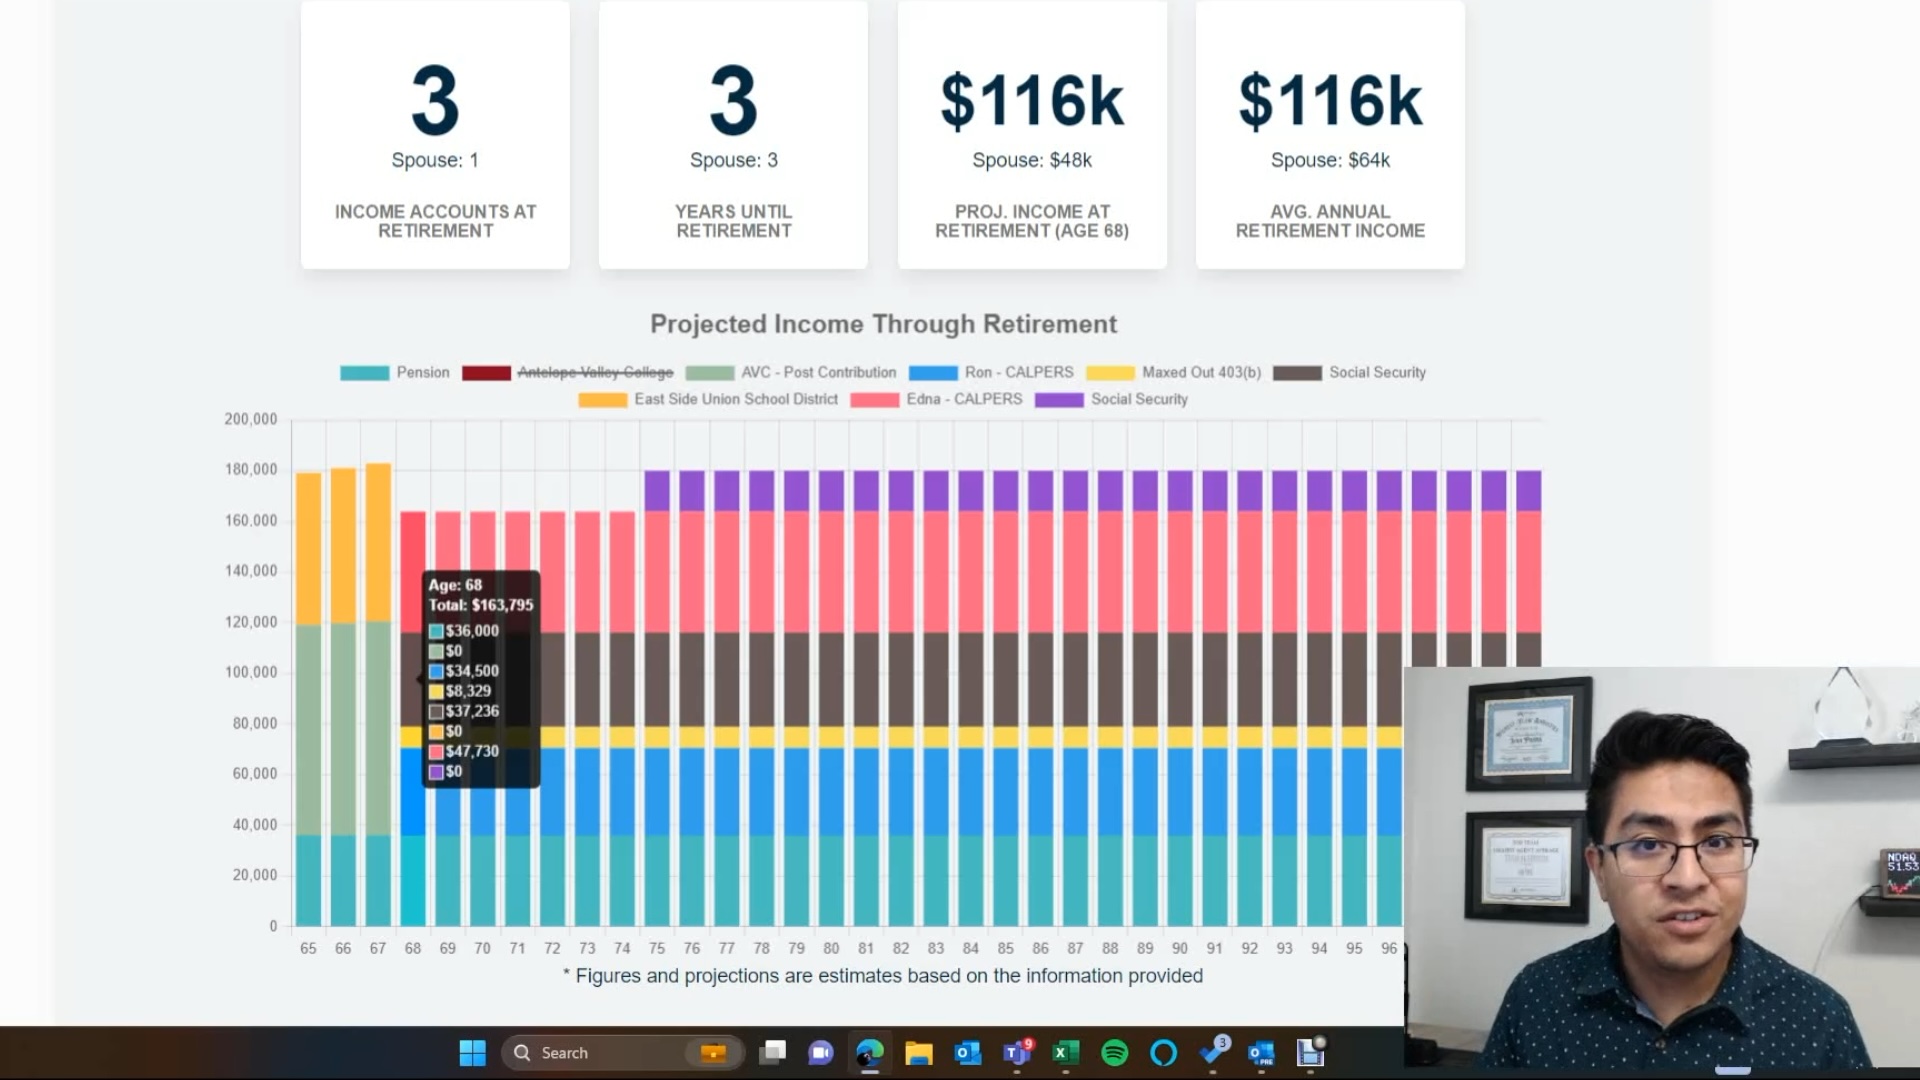
RISPIRA equips financial professionals with dynamic visualizations for engaging presentations, simplifying the communication of intricate retirement strategies. Integrated texting and email capabilities keep financial professionals connected with clients, facilitating timely updates and discussions. With automated follow-up features like annual retirement review notifications and reminders, RISPIRA ensures proactive client management, driving success in retirement planning endeavors.
More Effective
RISPIRA revolutionizes retirement planning presentations by offering dynamic visualizations that vividly illustrate individuals' financial trajectories and retirement scenarios. With intuitive illustration tools, financial professionals can craft engaging presentations that effectively communicate complex concepts, empowering clients to make informed decisions about their retirement goals.
By leveraging RISPIRA's visual capabilities, financial professionals captivate their audience, drive meaningful discussions, and ultimately pave the way for successful retirement planning strategies.


More Effective
RISPIRA transforms communication between financial professionals and their clients with integrated texting and email functionality, ensuring seamless and timely updates and discussions. By keeping financial professionals connected with clients, RISPIRA fosters stronger relationships, enhances client satisfaction, and ultimately drives business growth.
With easy access to communication tools within the platform, financial professionals can efficiently address client inquiries, provide personalized guidance, and maintain a proactive approach to client engagement.
More Effective
RISPIRA empowers financial professionals with automated follow-up features, including annual retirement review notifications and reminders, driving success in closing more business and maximizing earnings. These functionalities streamline client management, ensuring financial professionals capitalize on opportunities to make more money and write more IULs and annuities.
By leveraging RISPIRA's proactive approach to follow-up, financial professionals can efficiently track progress, address client needs, and ultimately drive growth in their business while providing exceptional service.

RISPIRA is packed with tools to help make financial planning and customer management easier. Use the carousel below to find out more about each feature.


Say goodbye to confusion and hello to clarity — RISPIRA helps financial professionals turn complex retirement strategies into engaging visual presentations and stay connected with clients through automated follow-ups and built-in communication tools.
Start using RISPIRA today and see how much easier client management and retention can be.
Get Started with RISPIRA!Below you can find some helpful videos and frequently asked questions to help you get started with RISPIRA.


How do I Import My Existing Data?
We provide an Import Package to help you get all of your existing data ready for import. In the Import Package you will get a template to use for importing clients, employers, addresses and polices adn well a "Field Details" file that explains everything you need to know about each field. There is also a README file that answers some common questions.
Use the button below to download a ZIP file. Once extracted, the folder will contain the files mentioned above.
Once you have your import file ready, visit the import page to upload your file and import your data. You can access the import page under Tools -> Import Data.
To enter a client from the home dashboard, navigate to the drop-down menu on the upper right and select "clients" -> "New Client".
To create a client, enter required fields and select "save." You can add a linked account for a partner to show both profiles on one screen by clicking "Add significant other."
Navigate to the "tools" drop down at the top of the home page and select "profile." In this section, you can upload a profile photo, write up an email signature, and assign an assistant. Twilio number override is used to change the phone number receiving messages (i.e. out of the office, messages can be directed to the agent's direct line).
For an assistant to view an agent's RISPIRA profile, the assistant can be assigned by the agent. To do this, navigate to Tools -> Profile. The agent will change the "Select an agent to be your assistant" drop down to the correct individual. The assistant will change the "Become an agent who has assigned you as assistant" to view the RISPIRA profile of the agent.
To create a proposal, click on the "proposal" button within a client's profile and name your client's proposal and enter any necessary comments. Click save to generate a proposal for the client. Multiple proposals may be generated per client if you would like to show projections at different ages.
Each proposal will include a section to add projected social security for the client at the desired retirement age. Additionally, the client's assets can be added within the proposal page for existing accounts and newly proposed accounts. Each account can be shown on the presentation page as income, nest egg funds, and potential death benefit. Ensure you select "save" after inputting new data/accounts for them to populate on the illustration page.
Upon completion of the proposal with all desired accounts, scroll to the top of the proposal input page and select "illustrate" to view the client's projections.
After selecting "illustrate," navigate to the right side of the screen. Select the cover page checkbox (if desired) and click "Save as PDF" for a report that can be saved and/or sent to a prospective client.
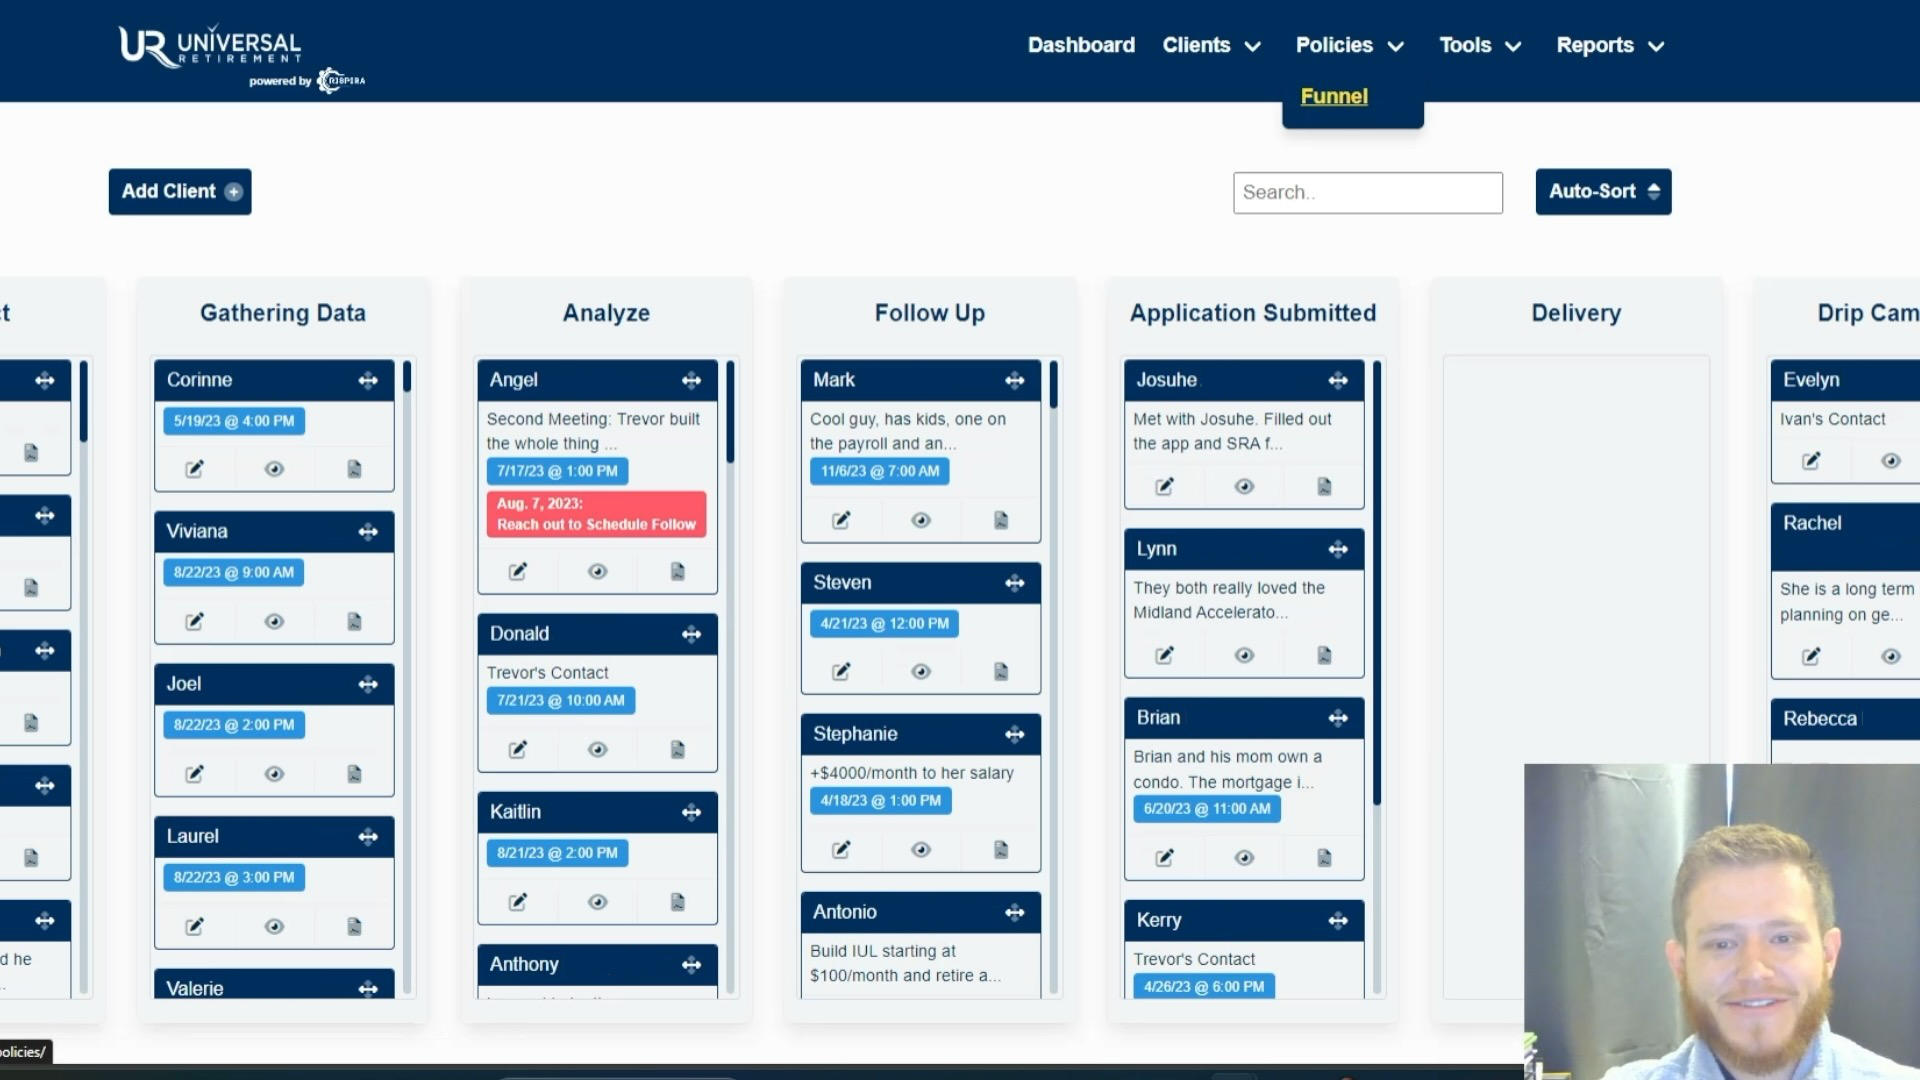
Upon entering the funnel, clients can be dragged between funnel columns by clicking the image next to their name (Marked with a black arrow). Clients may progress through the funnel as they transition through the meeting process. Once all steps of business have been completed, they can be dropped to the "won" category shown in green. This will remove them from the funnel, but they will still appear in "Existing Clients." If a client becomes non-responsive at any point in the process, they can be marked as 'Lost' (shown in red) or moved to the last column of the funnel labeled "Drip campaign" to receive marketing emails from your company.
To view strategies and account types, enter any client profile and navigate to the buttons next to the “save” button demonstrated below.
Tax differences will explain the account types and their tax status.
To illustrate a client’s retirement timeline, click the “timeline” button next to “tax differences.” The visual is used to represent working years remaining for the client and their spouse.
The strategies button outlines the market trends for the last 20 years for S&P 500 variable, fixed-indexed S&P 500, and fixed strategies for client presentations.
Notes should be added into clients’ profiles following each communication, correspondence, change, or outreach to keep an ongoing record of communication and action taken on each account.
To add a reminder, select the note image within the blue circle on the bottom righthand side of the client profile.
From there, select “type” and switch from “Note” to “reminder.” Enter the due date based on the day you would like the reminder to appear on your dashboard for completion and enter note. Then, click save.
To add a date for the next appointment, enter the client’s profile. Upon doing so, their placement within the funnel will appear above their name. Click the calendar Icon next to it to pick the selected date and time for the next meeting. Select “Save changes” upon entering the date. Refresh the client’s profile for the new date/time to appear.
Once reminders have been added into client profiles, the funnel will show appointment and reminder dates under their name. To sort these appointment/reminder dates chronologically.
On the left side under the data input sections, below the blue line there is an agency policy section. Select this section and input the data for the newly established account/policy with you as an agent. An annual review email will be automatically sent out if the “issued date” is entered.
Tags can be used to group clients into specific categories to later sort them using their tag. You can sort these clients based on their employer, their interests (golf, networking group), or any other group. This group tag can be used to send emails to anyone belonging to that group or used to track data for client’s belonging to that group. Enter the client’s profile and select “Settings,” then select tags. Enter the title of tag and click “create.” This tag will be saved for future use with other clients.
The main purpose of the policy funnel is to keep track of clients’ progress with more than one policy submission. The policy funnel allows the user to differentiate outstanding action items for each application submitted.
If a client within RISPIRA needs to be transferred to another agent, this can be done using the tools feature.
The settings option within a client’s profile provides several features.